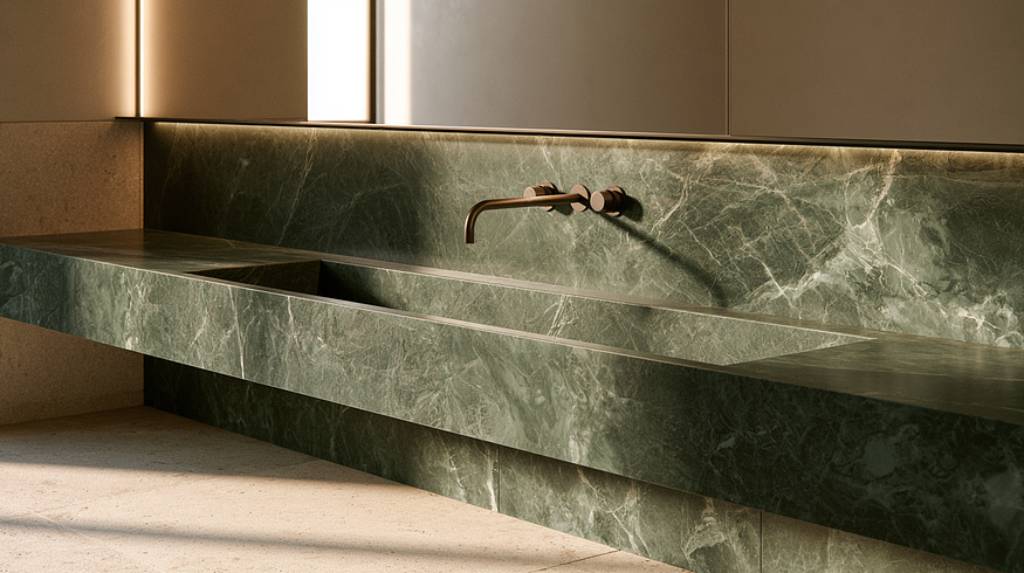
The concealed-depth mistake that turns an elegant basin wall into a coordination problem, a finishing defect and, sometimes, a future repair.
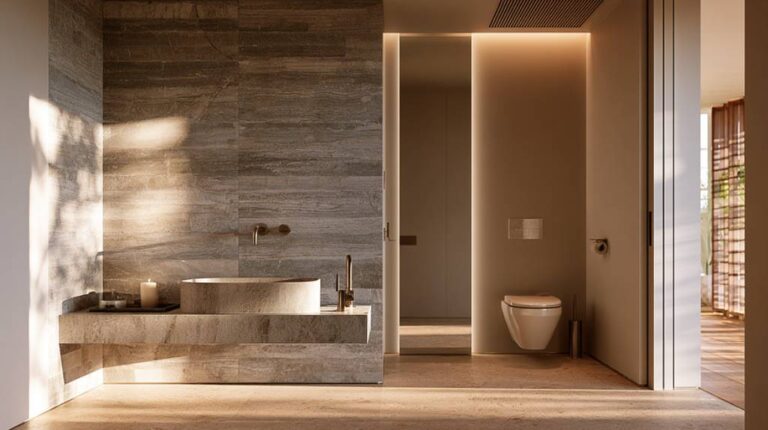
A wall-mounted faucet is one of those details that can make a bathroom or powder room feel quieter, sharper and more deliberate. The counter becomes cleaner. The basin reads more clearly. The wall seems disciplined enough to carry the fixture rather than merely receive it. In high-end homes, that visual restraint is often exactly the point.
But wall-mounted faucets have a habit of exposing weak coordination with unusual honesty.
When they are right, almost nobody thinks about them. When they are wrong, the finished wall carries the evidence. The trim sits too proud or too buried. The escutcheon does not close properly against stone or tile. The spout lands awkwardly over the basin. Splash behaves badly. The handle feels visually detached from the basin centreline. A stone fabricator enlarges a cut-out to save the installation. A contractor inserts a thicker ring to hide an error. A wall that was meant to look calm starts explaining the construction process that failed behind it.
The invisible decision is not the finish or even the faucet style.
It is the exact relationship between the concealed faucet body and the final finished wall line.
That decision has to be made before the wall is closed, before the stone or tile is fabricated, and ideally before site rough-in begins. If it remains approximate, the finished wall becomes a tolerance problem disguised as a luxury detail.
Depth Is Not a Site Adjustment
The problem usually begins with a dangerous assumption: that a wall-mounted faucet can be roughed in “roughly right” and corrected later with the trim.
Manufacturer documentation does not support that assumption.
One current Kohler wall-mounted lavatory faucet installation sheet for the Indian market states that the finished wall must lie between the marked minimum and maximum levels, and illustrates that requirement with a product-specific finished-wall range of 54–68 mm for that model’s installation condition. The same document also instructs that the valve installation be completed before cementing and tiling the wall. That is not decorative guidance. It is a dimensional requirement tied to the concealed body and final trim fit.
Another Kohler wall-mount lavatory faucet guide states that the outer surface of the finished wall should lie between the maximum and minimum marks on the protectors, again making the final wall position a controlled installation condition rather than an afterthought.
The broader lesson is straightforward. Concealed fittings are designed with a permitted installation window, not infinite forgiveness. Even adjacent concealed fitting systems in the sanitary category publish different depth ranges. Hansgrohe’s iBox universal 2, for example, lists a minimum mounting depth of 80 mm and a maximum mounting depth of 108 mm, underscoring that concealed products depend on product-specific installation geometry. No team should therefore set wall-mounted faucet bodies by habit, memory or “standard practice” if the selected product documentation has not yet been checked.
This is why concealed depth is not a finishing decision. It is a section decision.
The Finished Wall Is Thicker Than Many Teams Think
On drawings, the phrase “finished wall” can look deceptively simple. On site, it is an assembly.
Between the structural wall or partition and the visible face, there may be service chases, plaster, levelling layers, backing boards, waterproofing, adhesive beds, stone, porcelain slab, tile, sealant joints and trim interfaces. Each layer affects where the faucet trim will finally sit. In a luxury bathroom, where wall finishes are often thicker, more carefully detailed and less visually forgiving, the cumulative build-up matters even more.
This is the stage at which architecture, interiors, plumbing and finishing work stop being separate conversations.
A wall-mounted faucet needs to know what basin it is serving, where the basin sits relative to the wall, what the finished wall thickness will be, whether the wall is stone or tile, where joints fall, what backsplash or apron condition exists, and whether the wall is part of a waterproofed wet zone. If those pieces are resolved independently, the concealed body is forced to mediate between drawings that never fully met.
The most common consequence is that the plumber roughs in to a nominal centreline while the designer is still choosing finish thickness and basin geometry. By the time the stone is fixed, the faucet trim may technically fit but feel visually or functionally wrong.
And “functionally wrong” in this case does not mean catastrophic failure. Often it means the sort of irritation that persists for years: a spout that lands too close to the basin edge, water splash on the counter, a faceplate that is not cleanly seated, or a handle that visually floats away from the discipline of the wall.
The Basin and the Wall Have to Be Designed Together
Wall-mounted faucets are rarely isolated products. They are part of a basin composition.
That composition has at least five interdependent variables: concealed body depth, spout projection, basin position, basin geometry and final wall finish. If any one of them changes late, the wall may still accept the fitting, but the composition may stop working.
This is why the basin cannot be approved as one package and the wall-mounted faucet as another. The selection should be coordinated through real dimensions, not mood-board compatibility.
A faucet can be technically installed and still be wrong for the basin. Spout reach, water delivery point and basin depth all affect splash behaviour and day-to-day use. In an ultra-luxury residence, where the wall may be lined in bookmatched stone or a precisely detailed slab finish, poor water behaviour quickly becomes a maintenance issue as well as a design one.
The mistake is often discovered too late because the room looks complete in elevation long before it has been resolved in section. The rendering may be beautiful. The wall can still be dimensionally unresolved.
The most useful drawing for a wall-mounted faucet is therefore often not the interior elevation. It is the enlarged wall section through the faucet, basin and finish assembly, supported by a coordinated front elevation.
That section should identify the substrate, backing or framing, concealed body, hot and cold lines, final wall build-up, waterproofing where required, stone or tile thickness, hole positions, trim location and basin relation. Without that drawing, the site is being asked to deliver a precision outcome from approximate information.
What Usually Goes Wrong Behind the Stone
The concealed-depth mistake rarely arrives alone. It tends to bring a cluster of smaller compromises with it.
The first is trim fit. If the concealed body sits too deep or too shallow relative to the finished wall, the escutcheon or trim may not seat as intended. The installation may still be “made to work,” but usually at the cost of visual crispness.
The second is alignment. The wall finish contractor may centre a vein, joint or tile layout to the approved elevation, only to discover that the actual penetration points force cut-outs or offsets that were not accounted for earlier.
The third is waterproofing and sealing. In wet bathroom environments, penetrations are not neutral openings in the wall. They have to be treated as part of the waterproofing strategy. LATICRETE’s current installation instructions for HYDRO BARRIER, for example, require gaps around pipes, lights and other penetrations to be filled and dressed, followed by membrane application onto and around the penetration. That is manufacturer-specific guidance for a waterproofing system, but it reinforces an important coordination principle: penetrations must be anticipated as part of the wall assembly, not simply drilled through after the fact.
The fourth is testing. Kohler’s installation notes for wall-mount faucet valves explicitly instruct installers to check for leaks before covering the pipes and to apply the pressure test within the product’s stated conditions. Once a stone or slab wall is closed, a minor leak is no longer a simple plumbing issue. It becomes a repair problem involving demolition, finish removal and potentially difficult rematching.
The fifth is serviceability. Even if the installation survives completion, a poorly coordinated concealed fitting can become expensive during maintenance. If trim tolerances are tight, stone openings are overcut or access depends on improvised site solutions, future cartridge replacement or repair becomes more invasive than it should have been.
The Decision Must Be Locked Earlier Than Many Teams Prefer
The point at which this decision must be made is earlier than many residential teams are comfortable locking product choices.
Ideally, the wall-mounted faucet model, concealed body, basin, basin height, wall finish thickness and fixing strategy should all be frozen before plumbing rough-in is executed. If the project is highly bespoke, that freeze should happen before stone templates are issued as well. If the room includes heavy natural stone or slab finishes, the finishing contractor should be part of the review, not merely a downstream recipient of plumber-set openings.
Responsibility is shared, but ownership must be clear.
The architect or lead interior designer typically has to control the visual composition and finished-wall logic. The plumbing consultant or contractor must verify rough-in geometry, pressure testing and installation requirements. The sanitaryware supplier or technical representative should provide current product drawings and installation instructions. The stone or tile contractor needs confirmed penetration locations and finish build-up information. Where waterproofing applies, the applicator or consultant needs penetrations coordinated before the membrane and finish sequence are executed.
If no one is responsible for assembling those inputs into one coordinated approval, the wall-mounted faucet becomes a site gamble.
What Should Be Approved Before Installation
A disciplined project does not approve this detail casually. Before a wall-mounted faucet is released for execution, the team should be able to answer a few specific questions.
Is the exact faucet and concealed body selected, not just the brand or design family? Has the product-specific installation depth been checked against the actual wall build-up? Has the basin been fixed, and has the spout reach been considered in relation to its geometry? Do the drawings show the final finished wall face rather than only the masonry line? Are the finish thickness and hole sizes coordinated with the stone or tile fabricator? Has the wall penetration been incorporated into the waterproofing strategy where required? Has the rough-in been pressure-tested before closure? And has anyone physically checked, on site, that the installed concealed body still falls within the allowable finished-wall range?
On complex projects, a mock-up or dry-set sample is worth the effort. A stone sample, basin datum, faucet trim template and finished-wall build-up can reveal more in one morning than several rounds of rendered approvals.
The Quiet Luxury of a Correctly Set Wall
Wall-mounted faucets often appear minimal because so much work has been pushed behind the wall. That is exactly why they demand more discipline, not less.
What the homeowner sees as a clean spout against a beautifully finished wall is actually the visible edge of a concealed system that had to be dimensionally correct long before the room looked elegant.
The best wall-mounted faucet details do not advertise the effort behind them. They simply sit correctly. The trim meets the surface cleanly. The projection feels right. The water lands where it should. The stone remains calm. The wall is not explaining any compromises.
For Blueprint Stories, that is the real lesson. Luxury is not created by choosing a wall-mounted faucet instead of a deck-mounted one. It is created by making the hidden decisions early enough, accurately enough and collaboratively enough that the finished wall never has to negotiate for them later.
Blueprint Stories documents the decisions, technical coordination and execution controls behind high-performing luxury homes. Architects, designers, contractors, consultants and product manufacturers with a relevant completed project, product system, technical mock-up or independently verifiable demonstration may write to blueprintstories29@gmail.com for editorial consideration. Participation does not guarantee publication or favourable coverage, and all material support is disclosed.
Follow or subscribe to Blueprint Stories for future articles on the invisible decisions that determine how luxury homes actually perform.